While this article guides you on how to sync your garage door opener, remember that if the cost is not a constraint, you are better off with getting the synchronization or programming done by a professional.
A Little Information About Code Switches
Table of Contents
Older garage door remotes and newer ones have code switches but the difference is that older remote use permanent codes while the codes for newer ones change every minute since it is backed by rolling code technology.
The code is changed each time the remote is pressed. This is a security feature that makes hacking almost impossible. Each time you press it, the remote sends a signal to the garage door opener to either go up or come down with the help of a radio frequency.
Garage Door Remote Frequencies
Garage door remote has its own frequencies which are usually written on their pack. Garage door opener remote operates at the following frequencies – 300 MHz, 310 MHz, 315 MHz, 318 MHz, or 390 MHz.
Syncing A Garage Door Opener
1. Choose a remote
For easy troubleshooting when things go wrong, it is better to buy your remote from the manufacturer of your garage door opener. Besides, this erases any possibility of having compatibility issues.
Some of the best manufacturers of garage doors are Stanley, Linear, Allstar, Genie, and Liftmaster. So, remember this when choosing your remote.
Here is our choice for the best remote for the garage door openers.
Prices pulled from the Amazon Product Advertising API on:
Product prices and availability are accurate as of the date/time indicated and are subject to change. Any price and availability information displayed on [relevant Amazon Site(s), as applicable] at the time of purchase will apply to the purchase of this product.
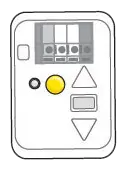
2. Try to locate the Learn Button
The process of programming or syncing your remote to the garage door opener differs from one garage door opener to another. You need the learn button to initiate it so you need to find the learn button first. Remove the light cover on the opener to find the learn button.
3. Program the Remote
After locating the learn button, you should press and hold on to it until the indicator light blinks on the opener.
Press the button while the indicator light is blinking. After that, you need to test the remote by pressing it once to see if the door will move. If the syncing is properly done, the door will move.
You also need to understand that a garage door opener can only maintain either five remotes or four remotes and a keyless entry. The implication is that if a remote is lost, you may need to erase all the codes from your opener to add a new one.
This can be done easily by pressing the learn button until the indicator light stops blinking. After that, you can now reprogram it by following the steps outlined above. Most importantly, the code switches in your garage door remote should match the ones in your garage door opener.
4. Syncing your garage door opener to your car’s HomeLink System
New cars usually have this instruction in their manual. However, if the instruction is filled with too many technical terms for you to understand, you can follow the steps outlined below to the syncing. This should not take you more than 10 minutes.
Before you go ahead, ensure that the handheld transmitter and the in-car transmitter are in good condition. Remember, garage door openers operate on a frequency of 288 – 433 MHz. The frequency of your unit will be stated on the back of the handheld transmitter.
5. Programming Your Garage Door Opener
Programming your garage door opener to your car HomeLink System requires raising and lowering the door several times, so you should ensure that kids and pets are prevented from coming to the area before you start the programming.
6. Start with a new battery
To be sure that the battery of the handheld transmitter is in perfect condition, start with a new one. Even if there has been a battery in it, you should replace it before the synchronization.
7. Switch to “ACC”
The next step is to turn the key to the accessory (ACC) position. It should be done before you begin to program the garage door.
8. Clear previous programming
If you think the garage door opener has been programmed before, you need to clear the previous programming by pressing the two outer buttons on the transmitter for about 20 seconds or until the light starts flashing.
After that, you can press and hold the button on the transmitter until it begins flashing slowly. This should not take more than 30 seconds. You still need to hold the button down for the next step.
Now, take the handheld transmitter and point it towards the flashing light from about 2 inches away. Press the operating button on the unit. Wait until the flashing on the light is a little faster.
This means that the frequency has been registered on the HomeLink transmitter. You can then release both buttons.
9. Complete the programming
Now, you may need a little assistance on this. You need a ladder and a flashlight. Check the learn button or training button on the motor located inside the garage. Be careful because the button is not usually labeled. It has a small light that flashes beside it when it is pressed.
If after pressing the learn button, the indicator light stays on continuously for a long period, it means the synchronization is done and the remote should function with the garage door opener. On the other hand, if the indicator light still flashes, it means you have just 30 seconds to complete the next step.
This is why it is advisable to look for someone to assist you on the next step. Not necessarily an expert but anyone that can support.
Go to the car. Remember, the key should still be on ACC. Press the button you programmed earlier on the in-car transmitter for three seconds and release it. Press it again for another three seconds and release it. The garage door should move now.
If it hasn’t moved, then you should press for another three seconds for the third time. The door should move now. If it does, it means you have successfully programmed it.
Final Verdict
Now that you have learned how to sync a garage door opener, you should also know that if after the whole programming the door does not move, it is a sign that you got a step wrong.
Instead of trying to troubleshoot it, call a professional. As a matter of fact, it is better to get it programmed by a professional for the first time.